considerable progress has been made. I alluded to how the darkroom was to be in our old cellar, but the discovery of small asbestos panels on the floor; filling the gap between the wooden floorboards and the concrete tiles put me off.
Well, actually it was more the asbestos that
wasn't there - the 10cc or so that had been crushed into dust through 60 years of neglect, and which now resided in the dust that I was in the process of vacuuming up.
Oh well. Time to design / plan another darkroom!
Recently, I've been having a spate of minimalistic thoughts. About how things should be small, concise, effective and portable.
Essentially, this means that things should be able to be removed and taken away with relatively short notice - and set up again within a short time. i.e. not bolted to walls, not heavy and inefficient - and not cluttered.
Perhaps this is linked to how I'm going to move out of my parents' house in a couple of years, and how I'd want to bring my stuff with me.
Anyway, it kind of led me to think about a 'cupboard darkroom' when I was designing the cellar one. I thought 'Wouldn't it be cool to have a super space efficient darkroom that just folded up?'.
I subconsciously added it to the list of 'things to do one day'. That paradoxical list that ensures it will never become anything more than a cool idea.
However, 'that day' came when I discovered the asbestos. I knew that any more work in that room was postponed indefinitely; and after a period of annoyance about how all the efforts toward that room were wasted, I realised that this was a perfect opportunity for me to build the cupboard darkroom.
Cupboard Darkroom: Essentially, it's a cupboard. And yet, also a darkroom. [woah!] When the doors open fully, they lock in place somehow; and in the space between the doors is an opaque cloth (ideally one that would pop up automatically when the doors open, a bit like how the bellows' on an old camera extends automatically when its' unfolded). Also in this cloth is a porthole; a lightproof, collapsable door using magnets or velcro through which one can clamber through - with style.
Inside will be a desk and shelves, and it should be a highly versatile space. I'm thinking harry-potter's-cupboard-under-the-stairs crossed with
lots of this crossed with a messy artist's studio.
I began, I think, about a 1.5 months ago. Experience has told me that you get ideas more often when your out doing things than when you're inside, writing blogs. Such that T-shirt silkscreening business idea I got while working at my part time job. More on that later.
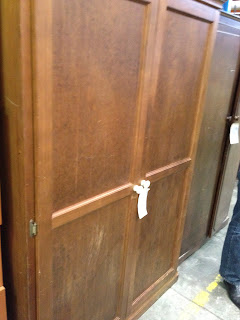
I went to a secondhand shop that I knew would have a number of cupboards available; and this was the only contender that was even remotely suitable:
 |
| If this is to be a photography blog, I'd need to get a lot better. quick. |
The issue being that my innate [and yet perpetually starved, but still fussy] perfectionist soul was not satisfied. This cupboard - and all the others there - was quite simply
not right. The general layout, size, etc were all wrong! At the time of writing, I can't really recall what these were, but I knew, from that point on, that I had to do something.
I had to build it myself.
And so the design process began. Learning from my experience building valve amps (such as a variant of the
headphone amp detailed here), planning and design can easily take up most of the time of making things. Although that's with the ideology that it will never be
completely finished; always evolving.
Anyway. Darkroom. Yes, I began to design shortly after visiting that shop, using sketchup. I haven't ever used it before for anything major or complex, but it is an amazingly capable sketching tool.
Several weeks of adjustments, modifications, etc, later and now I have a final design:
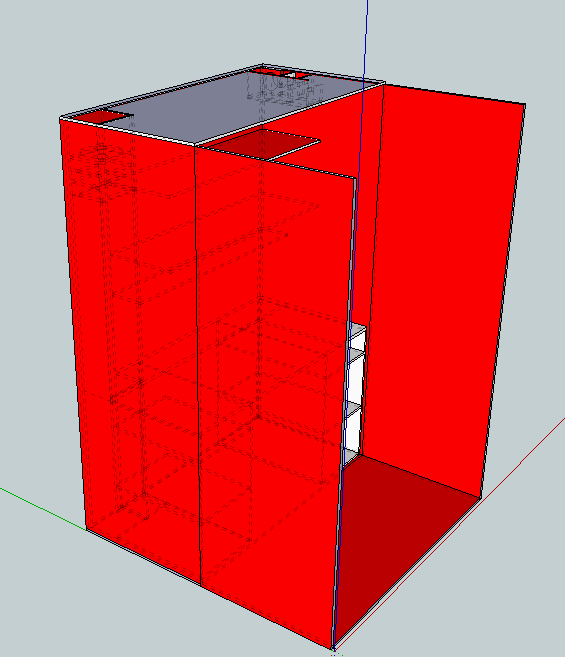 |
| It's 2 meters high, 1.4 meters wide and deep. |
Notes:
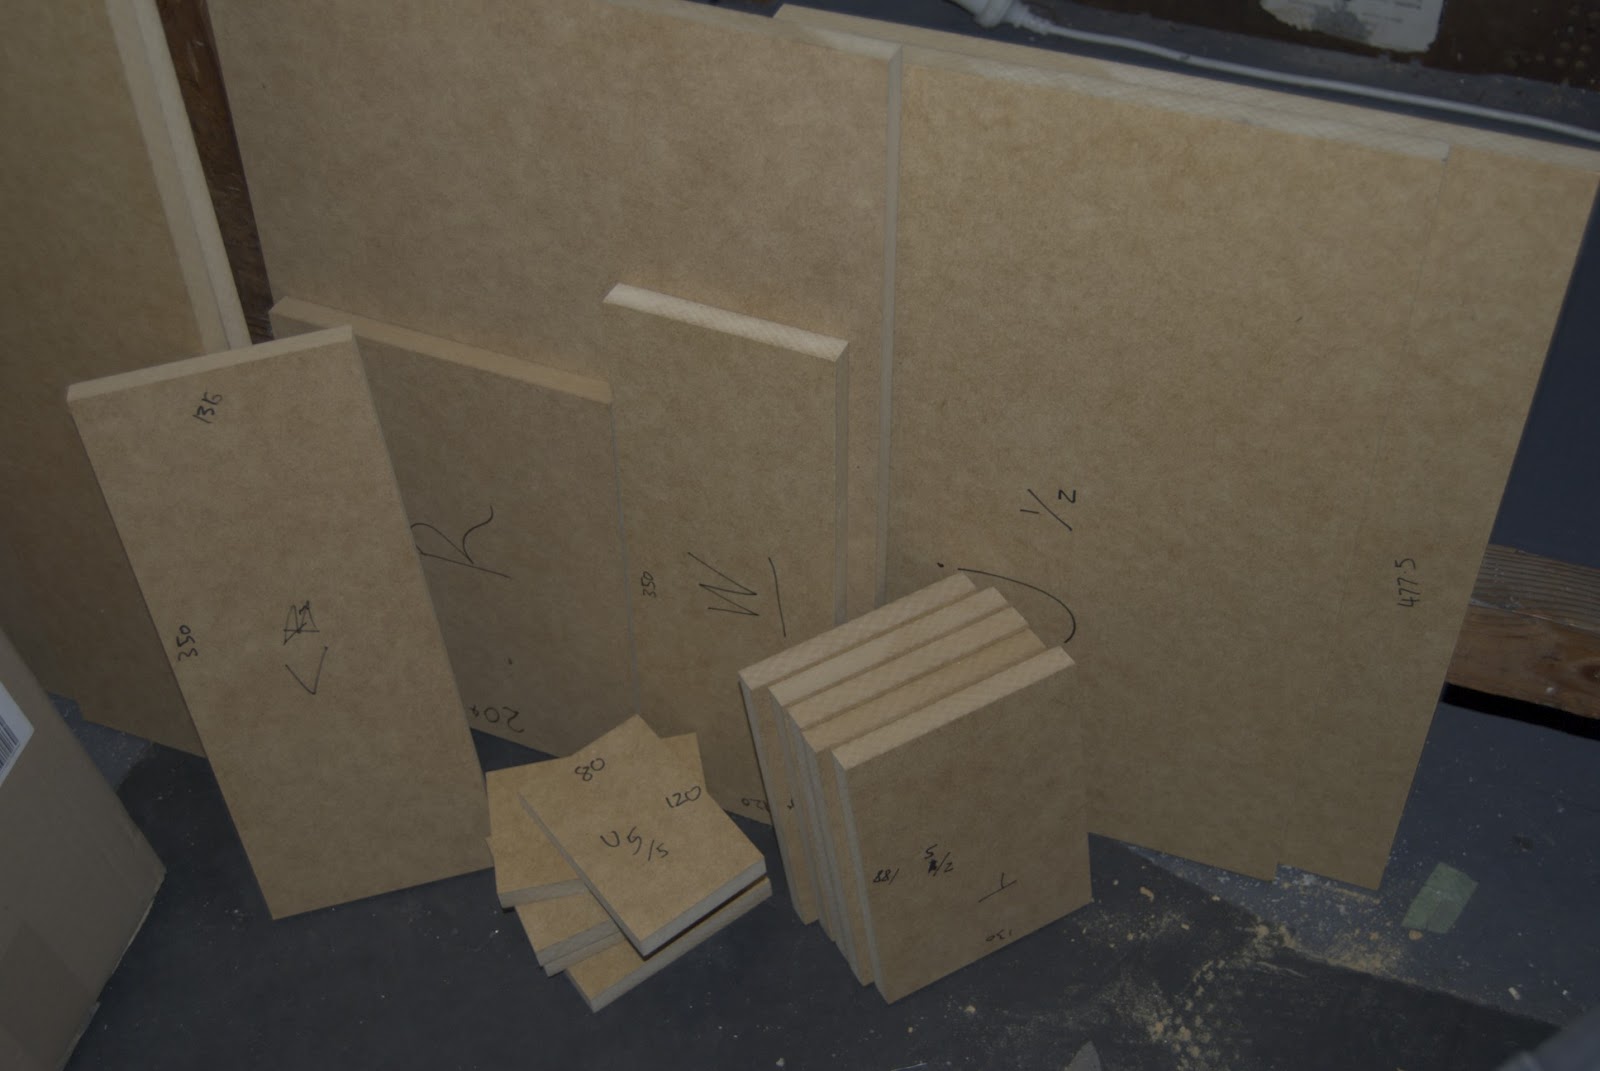
The holes at the top are little glitches I didn't repair. The design here exists only so I can get a list of wood parts to order precut in MDF.
The panel on the floor between the doors is a floorboard. wow! my very own floorboard!. It exists because the room it's going in has carpet on the floor, and I'd rather keep this cupboard as dust-free as possible. The board exists to act as a floor above the carpet-dust. It also helps with ensuring the light-tightness of the room.
The funny thing on the left side: The drying cabinet / out air vent. It's tall enough that I can dry 220 film hanging lengthwise; and also large enough to hold prints of 5" x 7". It has a light trap on the top.
The top-right-corner thing: The air in vent, plus a light trap.
So yeah.
I'm in the process of ordering the wood - so more updates on the construction of it soon.
Anyway, the darkroom. As you can see, it is both rather small and yet reasonably large. It's big enough for what I want to do, which is to mainly process film; including B&W, C-41 and E6. I've been thinking about enlargers and prints, and I've designed the maximum size my darkroom can handle (or fit in the drying cabinet) is 5" x 7" - If I want anything bigger I can just scan it. My local stationary supplier (Officeworks) can make A0 prints in colour for $25 and B&W for $5. Enough said.
Anyway, further updates to come within the week.


